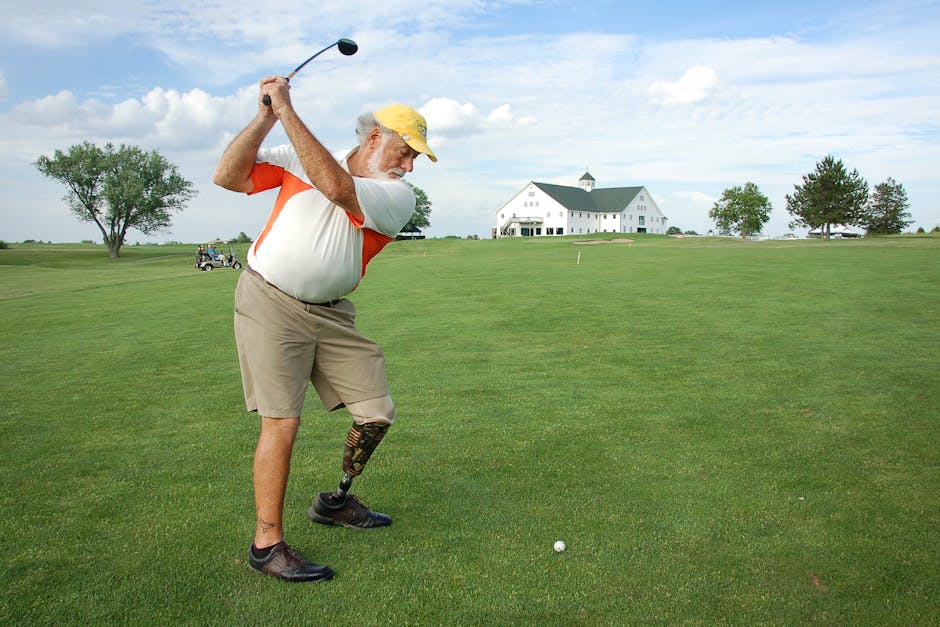
hey Kirk young you here from Setup4impact.com
today presenting my single plane golf swing learning systems that I've been teaching for over
20 years now and I basically boiled it down to the simplest possible formats this information can
all be customized to fit every individual golfer and I'm sure that it's the easiest way you could
ever learn to swing a golf club whether you're a beginning golfer a senior golfer or anywhere in
between this information will help you to play your best golf possible and that's because it's
based on how we set up to the golf on putting you in a position for what I call setup for impact
we're setting up so that attaining a great impact is easier versus conventional golf where
you're taught to set up basically with your hands below your shoulders and the club at an angle
with setting up for impact we're going to set up with the club on the same plane or in the same
position that we're going to be in through impact so I'm going to present my seven step program the
first two steps show you how to set up properly to the golf ball and steps 3 through 7 will show
you how to go about learning the golf swing for each step I'll also be putting a link below in
the description so you can jump ahead to any of the steps that you choose and also for future
reference you want to come back and see step 3 which is finding your ideal impact position
which differs from person to person or any of the drills you can jump and link right to those
positions in this video or you can scroll ahead in this video at any time this will be a pretty
long video I'm giving you all my information here for free basically because I want as many
people possible to try this simple method and for those interested I also offer schools which
you can find on my website at learning golf dot TV as well as an inexpensive membership program
which allows you to submit for my review and full email support as well we're gonna jump right
into this starting with step number one which is grip and how to hold the golf club step one
is very important obviously so the way that we put the hands on the golf club can't different
person to person based on hand size and grip size and other factors and basically how you play
golf your whole life if you play golf with what's considered a strong grip your whole lighter then
I would like you to keep that starting out if as you go on and start doing drills the ball starts
curving for a right-handed golfer to the left then we would make an adjustment to the grip and go
more to the neutral position that I'm going to use as the baseline neutral grip for this concept
and so starting out when we put our hands on the golf club we need to make sure that we're able to
create an angle between the leading arm and the golf club and this is very very important so I'm
going to take the club and hold it like this and then in this position I'm going to check to see
that the leading edge of the club is horizontal here and in this position also the back of my
leading hand is flat so I could put a glass of water here and the leading head cheer is also
flat so it looks like this so if I went at an angle this is matching basically the back of the
hand is matching the aim of the club face so when I do this I'm making sure that I can get close
to a 90 degree angle up like this we don't need we don't want more than 90 degrees that would make
it uncomfortable here in the setup we also don't want to go too diagonally through the hand like
this as that would put the club or make it more difficult to create leverage in the golf swing so
basically it's going through the hand like this and you can see it's kind of in alignment here
with my thumb and going across the hand this way it's not in the lifeline it's going across the
lifeline you'd see if I was going to reach out I fit the club into my fingers like this I find the
position where it fits comfortably in the palm of my hand but with the fingers wrapped around so I
hesitate to call it a palm grip or a fingers grip it's basically in between the most important point
is that the orientation of the club to the leading arm is what's most important we want to have the
club it set up so the grip is pointed underneath the leading arm like this we don't want it out
like this because if we come into impacts as we should then the club is going to tend to be open
and in order to hit a straight golf shot you're going to need to manipulate the clubface so we
want to make sure that when we hold it like this the club here is square the back of the hand
is in a neutral grip towards the target if you catch yourself and you're more this way that's
fine let it be a little bit stronger and again we can always adjust later if the ball does fly to
the left but a lot of you have been swinging for 20 years with a stronger grip position and your
body is used to making the move necessary to keep the clubface square through impact so my goal as
is always that we improve going forward that from one day to the next that you hit the ball better
not that we take steps backwards or that we have to practice for six months don't play golf and
all that I just don't like that I disagree with that philosophy and I've worked for many years
when people come to a lesson my goal is that you get the ball better when you leave the lesson
and it's the same here that I want you to improve you watch this video and you implement the steps
necessary for your game and you improve not that you go backwards if you're going backwards or
getting worse you're doing something wrong then you can send me a video through my membership
program it's very inexpensive and I can guide you in the right direction so you don't waste a
lot of time doing things wrong in my experience people get one part of setup wrong and they're
compensating for that and that's why they're inconsistent so you need to get every step correct
it helps to use video to be able to check on each step so the lead handgrip we talk about getting
in a position where we can get the wrist cocked a little bit here like this and the orientation of
club neutral has it fitting this way we wouldn't go weak of neutral which would have the back
of the hand here in the club face like that so anywhere from here to very strong a Dustin Johnson
type grip would be here so you can see the toes up here quite a bit that would be also acceptable
if you're hitting the ball straight from there then there's no reason to change it if it isn't
broke don't fix it and that's my philosophy I'm looking for fast improvement I want you to play
the best golf of your life and I'm certain this program will help you to do that so moving on
with the grip once we are comfortable putting the leading hand on the golf club we want to see
that we do this the same every time and I'm going to be going over as we get into the setup my
setup routine which I check and make sure that I set up to the ball identically for every golf
shot but first we have a routine we're putting the leading hand on the golf club I would check
the orientation every time whether it's here which is neutral or we go a little bit stronger
and that also enables you during the course of a round to make corrections if the ball is going
right or left instead of thinking about your golf swing we can just make a little correction to
the grip and it will most easily help you get through the round and possibly even put in a
great score so once I have the leading hand on the club I'll check it then we're going to talk
about putting the trail hand on the golf club we're going to do the trailing hand is take it
like this take the arm and we're going to also bend the arm a little bit at the elbow and that's
basically bringing the upper arm against the body and you can see the like this so it's a little
bit bent here looks like this a little bit Bend and then what we're going to do is take the arm
and we're going to basically sulfonate or rotate it away from the target like this so it's about a
45 degree angle and then we're going to put it on the golf club with a bent arm position that looks
like this so my elbow is not touching my body but close and the upper arm touching the body what
we're doing is putting the trailing arm on the same plane as the golf club at setup and that's
where it's going to be as between through impact so we're sliding the club basically or the grip
into the hand so it looks like this we're rotated this way and I slide it under the fingers until
the hand fits the other I'm not going to wrap the hand over I'm going to keep it underneath I'm
doing an overlapping grip which is my number one choice and we can slide it in so it's fitting in
the hand at no point am I going to rotate the hand this way or pronate the arm I'm going to keep
it in position here the thumb is a little bit over I feel this finger here it's like a trigger
finger as well it's basically fitting together for each person just maybe a little bit different
again based on handed grip size that it's sitting comfortably here together if you look here it's
just laying on top the little finger is laying on top of the index finger of the leading hand so it
looks like this now many people that I teach in my schools or private lessons will have a ten finger
grip again as long as there's no space between the hands this is acceptable my first choice is
though overlapping and then if interlocking if you can keep the same orientation that's
also acceptable so once we have the trailing arm on the club properly and we're looking at the
setup you could look at a mirror and what we want to see is that the trailing arm at least to the
elbow is on the same plane as the golf club if we laid the golf club on a tabletop the club and
the trailing to the elbow would be in perfect alignment so you need to check yourself on this
point this is really the most important point of the whole method is putting the trailing arm in
this non rotational position from this position here we're not going to have to manipulate the
hands in order to square the club face but it's most important that we get this alignment correct
as we put the hands on and I'm going to go through that in our next step which is the setup and
the setup routine so continuing on with step number two which is the set up and step number one
I covered the grip step number two starts with how we put the hands on the golf club and I do this
as a routine I want you to develop this you can start at home make a step-by-step list of how you
want to set up to the golf ball to make it a habit before you go to the golf course so it's always
always very helpful to do things the same every time and what I do I start with my leading hand I
hold the golf club like this but I feel that the clubs in the proper position here it's in my hand
like this and I check the orientation to make sure that my hand is in the neutral orientation that
I'm used to playing with from there I start to set myself up to the ball and start looking at the
direction that I want to hit the ball so I see a target in the background for me it's a white stake
here at the end of the range and what I do I take the golf club here and I'll aim the club looking
down at my toes towards the target and I'll just adjust my feet so I'm siding over the golf club
here along my toes and I'll set it up until it's pointed at the target and in most case four iron
shots I'll go slightly more open from that because I'm hitting the ball with a slightly descending
angle through into impact and so I'm checking the alignment here now this is very critical I see
a lot of people that don't do this or they have some other trick looking at a point in between
most cases people doing that still aren't lining up properly I'm also not a fan of swing training
or alignment aids on the range because you can't use them on the golf course I'm more in favor of
developing here a habit that will we set up to the gospel that the first thing I'm doing is orienting
my body towards the target and aiming and finding the ball position otherwise if you're used to
practicing with an alignment Aid on the range as soon as you get on the golf course you're gonna
feel like you're lost so and I see that happen a lot as people work on the range and in most cases
people using an alignment aid are also not even square with the alignment aid or don't have the
proper positions anyway or the alignment needs not even aimed at the target so develop a good habit
aim yourself however you choose to do it you can always check yourself here put the club down along
the toes and step back and see how you did and and then when you're on the range you can always
pick different targets to practice alignment I think it's critical to do this because alignment
if you're not lined up properly you're gonna have to compensate to get the ball to the target so if
I'm lined up to the right I'm going to have to do something to manipulate the golf club to get the
ball to fly in the direction of the target so lead hand grip alignment and as I'm doing that I'm also
selecting my ball position so this all goes very quickly obviously I'm explaining each step here
but for me to get lined up on the golf course takes less than five seconds so I'll be doing this
alignment and I'm setting the ball position and for this here I have a 9-iron and I'm looking at a
ball position here that's about between the middle of my stance and the inside of the leading foot
so in here for a normal shot now if I need to hit a higher 9-iron shock for some reason I'll play it
a little bit more forward if I need to hit a lower shot I'll play it a little bit more back if you're
making impact the way I teach and the drills are teaching you how to do the clubs coming through
pretty shallow through Packt anyway so that's one of the big advantages at the ball position
is a little bit left or right it's not going to matter too much because the club base is staying
square through impact anyway so lead hand grip and you can should make notes write this down aim
check your aim and double-check it if you need to you don't feel like it's correct in a lot of cases
when you're set up perfectly you're going to feel like it's not so check the alignment ball position
and from there what I'm going to do is I'm going to bend forward from the hips like this try to
keep my spine in a neutral position and I'm going to also shift the hips a little bit towards the
target which is creating a little bit of a tilt away from the target I want my head over the space
between the middle of my stance and the inside of my right foot so it looks like that yeah yeah and
then I'm going to let the hands drop down you can see the club is in a nun composition I want to
see that I keep the trailing shoulder here back off the target line I don't want to go out this
way so it looks like this I'm gonna reach in here from underneath and again put the trailing hand
on the club as we talked about in the grip video it looks like this I feel contacting the set up my
upper arm to my chest so it looks like this that and that's all I that's all we need to do so those
are the steps I'll go through it the way I do when I'm playing and generally I'll feel the club in
my hands here if it's my turn to play and I'll bring it there at the same time I'm going to aim
and choose the ball position my stance width is a little bit wider than hip width I want to be able
to turn during the golf swing and stay balanced too wide and what happens people have a difficult
time turning so it restricts your turning in both directions which cost people distance and accuracy
because you're not able to turn it's difficult to make good contact and so I see some ridiculously
wide stances which really cause problems I'd prefer more narrow more like Bryson D chambo
which makes it easier to turn and a lot of people especially as you get older it's much better to be
more narrow so that you can turn your body and get more distance but also more accuracy because if we
can turn we can make a better impact position with the grip leading the club head through impact
so stance with this here the right foot the trailing foot is pretty straight here unless you
have some hip issues or it's really hard for you to turn then it can be slightly open the leading
foots always going to be turned out about thirty degrees so here's stray leading foot is a little
bit turned out the knees are a little bit bad so meet handgrip checking my aim ball position
knees are flexed hips move forward as I'm bending forward wrists on [ __ ] I'm gonna reach in
from underneath I feel the contact here and that's what am i checkpoints some of you if
you tend to go through impact with the arms straighter you may not have that contact there
so we've kind of want to see how you go through impact for me it works a lot better a little bit
closer and with that contact through impact so go through this step by step it should
only take about this long to accomplish and I'm ready to go one other point which
will cover regarding setup is distance from the ball and your distance from the ball again
it varies from person to person I find it absurd that somebody would tell you exactly how far you
need to stand from the ball with a 6-iron or with the driver the fact is I'm six foot tall and if
you're copying somebody that was five foot six or six foot six obviously there's going to be a big
difference as far as your distance from the ball your club length obviously matters your clubs are
an inch longer or shorter the lie angle matters and all of that is very important I talked about
that in my Club fitting information but distance from the ball will be determined when we make
golf swings and start doing the drills we'll see when we make the proper motion without needing to
drop down or pull away then then we have the right distance we can see where the golf club strikes
the ground and then that's your distance for that golf club but I've covered that as we get into
the ball striking drills which are steps five six seven so step number three I'm going to talk
about impact and obviously the methods name set up for impact and when we're setting up for impact
we need to understand the difference between set up and impact and why there is a difference and
this is a really important step so you're going to want to come back to this and make sure you're
doing this properly our goal obviously when we're trying to make impact is that we want the clubface
square to the target we want to get the ball in the middle of the clubface and we want the club
to be moving in the proper direction at the right depth we won't hit the middle obviously if we're
too deep and hit the ball hit its bat or if we're clubs coming up into the ball we hit it then so
when we're trying to achieve a perfect impact we need to see that a couple things are happening
we need to see that the golf club is coming through impact fairly level there's four very
important points here that will happen if you do this properly if you followed my setup and grip
information what we're looking for here these four things will happen as long as the grip of the club
is leading through impact and your body continues to rotate through impact if your body stops as it
does for most people I see in the downswing the body stopped in this position and the club goes
through you're not going to be able to achieve all four points that are important for a perfect
impact and what we want and a perfect impact we want the club but we want the grip leading
through impact and you can just pick up a golf club yourself at home and try this if you pick
the club up in your hands and you and you move it keep the grip ahead of the club head like this
and just watch the club pace and you'll see that the clubface stays pretty square it may be on
a slight arc around your body but it stays very square now what I want you to do is let the club
head pass the grip and you'll see that there's a lot of rotation in the club head the Tour players
are certainly doing this as well they're all going through like this to lessen the rotation of the
golf club they're doing it from a very difficult position to learn their setup position obviously
they've hit millions of balls to make it a habit so I'm simplifying it through the setup so that
you can concentrate on perfecting your impact position so that you can become a consistently
good ball striker so as we get in and we're trying about that so our goal is the grip leading
and that's gonna keep the clubface square but we also will achieve as long as we keep rotating
the body we can make it so the club is coming very shallow through impact so there's a longer
flat spot here through impact and that's because if I don't rotate what would happen is the club
goes down and runs into the ground you hit the shot fat or if you miss the ground what happens
to body stop and the club heads moving up as you come into impact so we need to continue to rotate
through impact and what's that's doing is it's pulling the grip up slightly this also aids as far
as hitting the ball farther because of parametric acceleration and it's something basically
we're pulling up on it's kind of like a whip and cracking a whip that we're pulling up we're
not thinking about that the fact that the body is rotating and the leading shoulder is rotating
up and away and that's going to help accomplish that and the drills show you how to do that you
might say you know it seems complicated it really isn't if you practice and you follow the drills
that are coming up you will be able to do this if you don't do it what you're you're sacrificing
is this lab spot and so you're going to always be fighting the tendency to hit the ball fat and hit
the ball thin and you're sacrificing distance so I really don't find it so difficult people just
mainly don't understand why we need to do the things that we do to hit great golf shots why
do we need to turn you would think you're going to throw a ball I mean you're gonna have be much
more successful if your body's turning and from my experience in working with people in my schools
who are up to 90 years old everybody can turn a little bit and that's all we need is a little bit
of turn to accomplish this and you could try this at home simply moving the club from here to here
as long as you're turning and the grip is leading you can see it can stay pretty shallow pretty
close to the ground versus this where we do that you see the club come is up and down because the
hands are active in the body stopped and isn't turning so very important another important point
is yes we're doing this properly and again it's the same concept work running through the shot
the club will stay longer on the target line so the club has and the path can be pretty straight
you could try the same thing we just did along a straight line on the floor if it's carpet there
could be a line on the floor and you just hold the club there and you move you could see as long
as you're rotating it's a pretty straight line if you're standing really far from the golf ball
as I see a number of people then you see much more of a curve you see a lot more from inside
to outside and it's really difficult to attain a straight path it's a lot easier standing a little
bit closer to the ball like Bryson DeChambeau the more you get over the ball the easier it is to
have a straight path so I think that's why he's such a great ball striker and it's won so many
tournament he's set up on his impact plane he swings on a single plane and he has all of the
advantages of the grip leading and turning his body through the golf shot so in attaining this
turning action through impact it's important that we don't do things to restrict the turning of
the swing obviously if you try to do something unnatural I keep the leading leg bent at impact
and try to try to go like this and try to keep the trailing heel on the ground you're restricting
turning your body is basically gonna stop you're gonna lose distance and it makes it harder to
attain a good impact position and I've dealt with a lot of people I've worked with tons of people
who have really worked on this I did it myself in the past and I improved dramatically the people I
teach all improved very quickly once they get this idea out of their head that they need to keep the
foot planted on the ground you could just say if I was going to again throw a ball and keep the heel
on the ground it's extremely unnatural it blocks natural movement we don't want that basically as
we're trying to get into impact the leading leg is bent and it's bent coming into impact but it
is straightening through so it's straightening through impact and as we go through it becomes
straight after impact so we do not want to try to keep it Bend I see a lot of people a lot of the
swings I see something like this is obviously not only sacrificing accuracy but you might be losing
30 to 40% of your distance so just don't do that try to try to think about what would you naturally
do here if you're trying to swing obviously it's not going to be that it's not gonna be bad it's
gonna be something like that the natural motion we want both power and accuracy the fourth benefit
is that to hit the middle of the clubface what we need to do you can put the club put the ball on
the counter top and hold the club straight you'll see impact would be here pretty low on the club
face like this as soon as we move the grip forward you see the ball moves up the face and it would
be in the center of the club taste so you hit the ball in the middle we need to have the grip
leading the club head so it needs to be something just only about like this it doesn't have to be a
whole lot but it needs to be in this area and we would first see the straight line relationship of
the lead arm and club after impact so in this area that's what we're going to practice in all of the
drills is attaining perfect impact and it's very important to understand that's our goal that's
our goal of the drills so keep coming back to the drills and practicing and trying to attain that
position so what I want you to do now is take a golf club go through your setup the setup routine
if you're in your house you could aim at something in the bat like a picture or a chair just to check
your alignment we're getting in the ball position and then once you're set up and in your setup
position all I want you to do is to feel your feet put some pressure against the ground to help
you turn meaty my legs are slightly bent here I'm in my setup position and all I'm gonna try to do
is use my feet and legs to rotate my hips towards the target and I'm pretty flexible so I can rotate
quite a bit while keeping my head in position and maintaining the same spine angle so you could look
in a mirror you'd see the grip is getting moved forward because of my body rotation the grips
moving forward like that and it's also because I'm rotating feel the pressure against the ground
it's also going to start turning my upper torso as well so both for me and impact might be rotated
about 45 degrees towards the target if you're only able to do this 10 degrees that's fine that's your
limit of flexibility we just want to be consistent that that's what we're looking for that's our goal
and that we make swings that's our goal is before we hit the ball we want to be in that position my
drills are going to show you how to do that and if you practice them properly you're going to be able
to improve your impact position improving impact is what it's all about I see people working for
years and years and years on how to take the golf club back if they're taken inside and over and
trying to take up 500 positions on the backswing for me it's about working on impact once we get
the setup correct it's working on impact in some cases we do have to work on on making sure that
instead of the hips sliding on the backswing that they turn in I'm going to be covering that in the
drills which are coming up I just want you to get a feel for what your individual impact position
should be again the four important points that we achieve with proper impact less clubface rotation
club stay square through impact it's a longer flat spot the best players achieve about an 8 to 10
inch flat spot through impact which would create instead of big divots it would be more of a bacon
strip type divot we also have a straighter path through impact and we can hit the ball in the
center of the clubface so this eliminates the fat in shot you just need to stick with this
I spend a lot of time in my schools going over this and training this and will train this for
for many hours so it's a lot of fun drills also for chipping and pitching it helps in the bunker
an obviously full swing and driver this is all applicable so it's important to understand work
on the impact make sure that you understand it and and make some movements through impact and
then you can move on to the next step so step four in my seven step learning program include six
drills which address each part of the golf swing these drills should be learned before moving on to
the ball striking drills you should also have gone through the previous three steps of grip setup
and learning your ideal impact does this so in step four drills one two and three basically you
think of one-third backswing two-thirds and full and then learning how to move the club into that
proper impact position drills four five and six are again just dealing with different swing
lengths in the true swing which is also very important to learning an ideal golf swing so as
we get into this again we're always going to want to go back making sure that we're holding the club
ideally that was in step one or basically checking to see that I'm set up that I'm aimed properly
even doing the drills I would check my alignment making sure that I'm set up properly I got that
the hips moved over and I'm getting the arms in the proper position so I'm gonna go through
steps one and three first the goal of these drills though is always to get into the impact
position so that it looks like this so the grip is leading through impact making sure that my head
is staying in position my hips are turned I'm not trying to restrict my feet or keep my feet flat on
the ground at any point here if you tend to come up a little bit more that's fine you can see that
obviously has nothing to do with making you move up into the golf swing and it will protect your
back from injury and we're able to turn better through the shot as opposed to trying to stay
flat on the ground which will stress the lower back so if we're drill one then all we're going to
do from our set up position we're simply going to turn using the legs and make sure the hip turns in
the trailing hip needs to turn in we don't want it to move out we don't want the weight going to the
outside of the trailing foot and the head needs to stay in position so I'm simply going to turn back
to this position you can see my leading knee has come out the clubs here I haven't done anything
with the hands yet and I'm in this position here and from here all I'm going to do is go back
to my impact position trying to get my body there first so I'm going to feel like I leave the
club here in this position as I start moving back to impact and then as the body turns it's going
to slowly move the club into my impact position you want to repeat that drill number
one a few times let's hear hear and then you can move on to drill number two
and drill number two what we're going to do same procedure we're going to turn back but we're
going to continue back so it's going to be about a two-thirds back swing still making sure that
the hip turns in cocking the wrist and then from here we're going to maintain this position
I still feel the upper arm against my body and from here what I'm going to do is again I'm
starting with the legs I feel like I'm leaving the club here and I'm going to turn and that
turnings going to bring the club in like this and I'm going to let the club release and there I
am add impact I'm in my impact position which we learned in step 3 it'll do that a couple times
then checking the alignment drill number two so you want to do these girls slowly for drill
number three we're just gonna make your full backswing it's gonna go back turning I'm trying
to keep the weight on the inside of my trailing foot [ __ ] the wrist and then shift turning
the hip but by the time we get here I'd like to just stop here for a second and then let
the hands release and the hands should be more opposite your leading leg when we get
to impact this is one you're gonna have to practice a little bit it's really important
to go step by step and get this one correct as we go into drills four five and six it's going
to be the same concept we want to find our impact position first we're going to learn how the club
should move through and pass impact in this case I won't use the ball you could use one and push
it out of the way but you could use a point on the ground again alignment important and all
we're going to do here set up position where to turn the body to impact you could also say you
could also do drill number one find impact here and so starting from impact for drill for all
we're going to do is that the club move along the ground here moving forward until the club
head is past the leading toe and in alignment with the leading arm like this or slightly
ahead our goal is to simply move and drill for is to move here impact and here practicing
basically a flat spot here to here grip would be pointed you extended the club pass the side of
the body I do drill number four a couple times make sure the leading hip is over the leading foot then you can move on to drill five drill number
five we're going to again we're going to be moving from our impact position through position and
drill four through drill four and on continue rotate and keep the head in position as long as
you can and with the club pointed towards the target in this position and in line with your
trailing arm it shouldn't be up here should be right here and you see my hips have turned more
and I'm here in this position the club when it's going towards the target will look like that it
shouldn't be here it should be in that position the drill five again impact turning to here turning impact that's go five
trying to keep the head in position from there for drill six we'll just continue
rotating through standing up on the lead leg trying to be balanced toward the target you
can turn your body's true to the limit of your flexibility don't over stress yourself but
you should see if you're flexible you could turn through pretty far if you're not your finish
position will probably have the chest ports of target see that the trailing foot has come up
and it's in this position we do drill six we're gonna go through all we can do four or five
and six together so basically looks like this or five six so once you have a good feel for these drills in
step four you can move on to step 5 so in step 5 we're going to start using golf balls here with
the drills I strongly recommend though making a number of practice swings before each shot check
your alignment that you're lined up at something I've lined up at a white stake in the background
a little bit to the right of this red marker here for some of these thoughts I might be able to
use draw trace or later I'll have to see if that works or not basically what we're going to do
it's very simple once you understand the drills in step number four drills one through six for
ball striking drill number one all we're going to do is be moving from the position in drill
one which was here so it's not very far down the club head was below knee height and then
we're going to move through to the position where we were in drill four which had the club
had just passed the leading toe and the grip of the club just past the body so if we lengthen
the club the club would never be pointed back towards our body in this drill and so this is
very important and I want what I want you to do is try to relax your hands we don't want to
be too stiff as we do these drills I want you to be very relaxed get yourself set up here
and I want you to simply move from here stay here there's a little bit too far here to here
the ball should only move about ten yards here but I feel that I'm getting to impact here with
the body I'm using my feet I feel the leading leg straight and going through impact we just try
to have a rhythm of this motion here or swing on a single plane back and through once it feels
good we'll go to the ball and just repeat and a hold defendant if we hold the finish here you
want to see that the grift pointed to the side of the body in addition when we're making the
practice once we should be noticing where we can comfortably strike the ground that we're striking
the ground pass the ball here so it looks like this here here but it's also going to give you
a feel for the distance from the ball so I see the club making contact here and then I'm going to
move forward to the ball keeping the distance the same again I feel the contact again you should
have looked at the first four steps before this step one was the grip and how I go through that
as far as the routine and then the step two is to set up routine and just simply moving from
there into finding your impact position and then the drills one through six are all in step
four my hands are relaxed the practice swings so advanced drills then what you can do
and it's very helpful for a lot of people especially the trail hand version of this
drill so what we're going to do allstar I can grow one but with the trailing arm
we're gonna get into our setup position we're gonna remove the leading hand and
we're gonna hold with the leading hand above the elbow on the trailing arm like this
and then we're gonna make the same motion from here to here you'll see here you should be
the space between the forearm and the club actually increases from set up so it's set
up it's here and when I go through there's actually going to be more space there versus
left so we don't want to see this we want to see that so get in your normal set up position
I'm again going to check my alignment set up and a few I'm getting into my impact position my
head staying in position my hips turning properly I'm gonna hold the finish went through a little
bit farther and that's why you want to hold the finish a little bit farther than I want it's
really important to keep checking the finish check your alignment and setup go through the
routine as you're practicing and then do the drill I want to feel like it's my body that's
moving my hands my hands relaxed even though I have just one hand on there and I'm checking the
finish position that was much better even if the ball wasn't hit perfectly the motion was very good
again we want to get a feeling set up position feeling a swing I see where I'm hitting the ground
and then I adjust I need to move that distance to the ball the last time I didn't move far enough
into the ball now I am that's perfect that's kind of how you want to work the drills will be your
guide if you're finishing in the right position that's really important and in the schools we're
working on perfecting these drills make sure that everybody learns them perfectly and once that's
accomplished everybody hits the ball better so a lot of people aren't aware when they're making a
mistake with the drills and that's where the video feedback is really important using the freebie one
golf app sending in videos from our review it's part of a very inexpensive membership if you just
want you need to have that feedback as we move in the leading hand version of the drill again we're
going to setup the same this is more difficult for a lot of people but it should be something that
you still attempt here's my setup position the hold now the leading arm above the elbow and
then I'm gonna do the same thing is move from here to here and here I want to make sure the
grips point is under my leading arm like that my clients have really good success after doing
the lead arm drill and you can eventually make some longer swings to lead a arm drill but I've
had really good success hitting the ball after I do that so if I do some lead arm Drills and
then make some normal swings it works really really well very good those are the drills
for step number five balls riding drill on the lead and trail arm drills and I'm going
to move on now to step number six and ball striking drill number two or ball so I can drill
number two we're going to be combining what we learned in the drills in step four which were
drills two and five and so we're going to get in our set up position and then all we need
to do is learn to move from in drill number two we were here and it drill number five
we were here we're moving from here to here here here trying to hold this finish position
up toward the target and moving nice and slowly so once I have the feel for it I'm just gonna
go nice and slow here see here get straight and I'm on the back of the range you're filming
that's why the grass isn't so perfect simply but from the Sun the position of the Sun
for filming it's just a better position so again going through my polo team here for ball
striker drill – this is in step number six if you use my practice swings as a guide also I'm
going from here to here and I want to see that I'm striking the ground in the right position
I should feel that I'm staying level with my body so I want the hips to stay level and my
head to stay level as I'm making this swing that's something you can always check in the
free be one golf app shoot a little video of what you're doing some people do these drills
at home in their backyard with foam golf balls it's also great one perfect death straight
and finish was exactly what I'm looking for another ones that's great perfect and once you feel comfortable and you have
success with ball strike and girl number two then you can move on if you do struggle
with ball strike and grilled – then I would recommend going back either to the drills and
step four and reinforcing the proper movement and then ball strike and go 1 and step 5 and
then this drill again if you're having success with this grill then you can move on to step
number 7 in step number 7 we're going to be doing ball striking drills three and four and
in ball striking drill three is simply moving from the backswing of drill three to the finish
of drill five so ball striking drill to was two to five which was a 2/3 swing now we're making
a full swing but not moving at full speed and finishing where we did in the previous ball
strike and Grille so finishing in the position from drill five which is here so for ball strikes
drill three we're moving from here to here move slowly at first pay attention to where your club
striking the ground check your alignment as always perfect check the grip make sure it's correct
my grip tends to get slightly stronger I'm not paying attention to it and then
the ball will fly slightly to the left he has one dead straight perfect and I'll do
these drills regularly especially starting with ball striking girl 1 and I do a lot with
ball striking real 2 and then I move on to the longer swing but I'll always come back
to ball striking drill – I have any issues another one that's straight so for ball striking
grill number four it's dimply moving from drill three to drill six so I would practice out
a couple times first especially here going through to the finish this is also great
for warming up on the tee a lot of people don't think about when they start swinging the
driver if you didn't have a chance to go to the range about the speed the pub is moving and
the importance of a good follow through and finish so in this drill we're going to try to
finish all the way through I'm going to move from here to here making sure that I'm making
good contact with the proper position on the ground first so it's basically moving from drill
three which is here to drill six which is there no perfect again these make a lot more sense these ball striking grills if you watch
the previous steps one through six to learn the proper position now that one's that straight the work step
by step through this program I'm going to have the videos individually step by step as
well as a couple of bigger videos with all the information in one with links to each
step so please subscribe here on YouTube any comments or questions put them in the box
below also visit Setup4Impact.com to find out my upcoming school schedule as well as check
out my inexpensive membership which allows you to submit videos for my review thank
you very much I hope you have a great day you